STEP 9 - Setting up a mail merge auction template for the "Good" grade comics
NOTE - The first time you create an auction from scratch in Jumble Saler, it came seem a bit slow. However, after the first one, you can just copy it for additional auctions. If you already auctions online, you can download to the 'eBay auctions tab' and select one and then click on the 'Copy to new' button to save time.
Anyway, we will set up a brand new merge template auction here:
1. On the main Jumble Saler screen, click on the 'New auction lots' tab:

2. Click on the 'Add new' button at the bottom of the screen to load the 'Add new item record' screen.
3. In the title box (this is normally where you would put the title of a new individual auction), type in
Good comics mailmerge
4. Click the 'Browse categories' button.
5. Click the 'Ask eBay' option, type in 'scream! comic' into the 'eBay search text' box and click on the 'Ask eBay' button. The categories are different on eBay US, eBay UK, eBay Australia, etc, and they may use different category numbers and names for the same product:
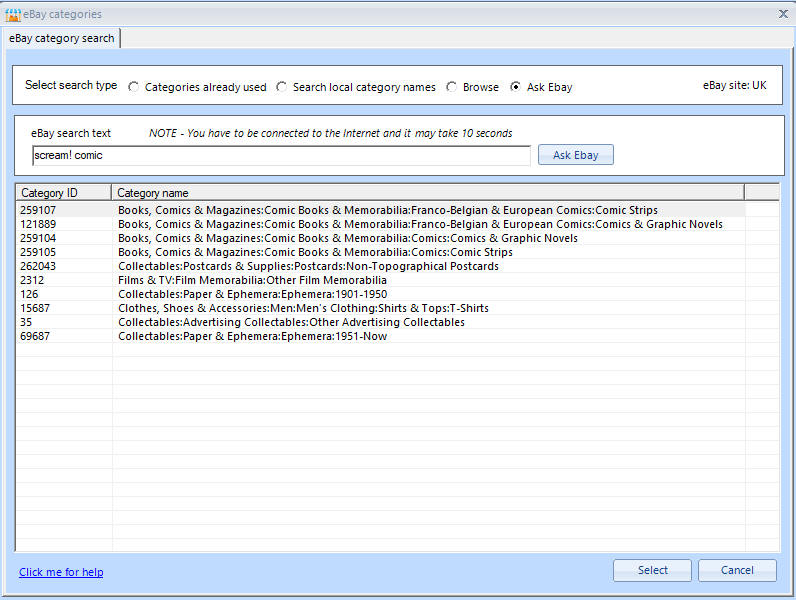
6. Select the first category (259107) or the 5th one in the above screen (262043) and then click on the 'Select' button to return to the previous screen. This walkthrough was created using an eBay UK account.
7. Select 'Good' as the condition and put this in the 'Condition description' box (you can copy and paste this to save typing):
A good condition, good looking, complete, clearly second hand comic with a few minor tears, corner wear, folds, etc.
8. In the 'Brand' box, type in 'Scream' and in the 'Our group' box, put in 'Single comics'.
Your screen should look something like:

9. Now change the 'Stock System group' list to 'SCREAM' and then 'Use generic stock + image' to 'MAIL MERGE TEMPLATE'. This will update the screen to show loads of new options that are designed so that you can mail merge stock in a very flexible way.
10. Set the following:
Stock field: Good
Number range: All numbers
Title template: Scream! comic #<ISSUENO> - <ISSUEDATE> <TITLEADDITIONAL> <EXTRAIFROOM>
Use price field: Yes
Exclude key: No
Exclude gift: No
Exclude XMAS: No
Exclude variants: No
Exclude anniversary: No
Exclude milestones: No
so the settings look like:
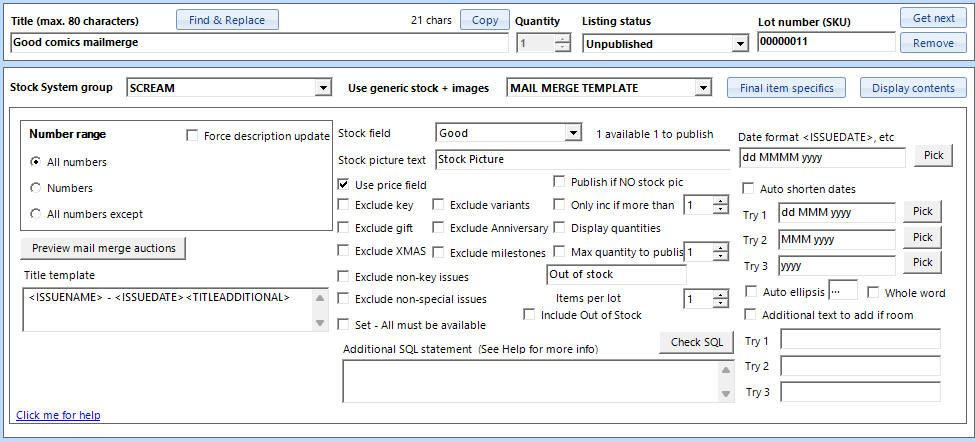
There are a lot of setting here so that you can fine turn mailmerge auctions. You could have several differnent mailmerge auctions with different settings.
11. Now use the 'Preview mail merge auctions' button so that you can see how the Title template is merged with the Stock System records:
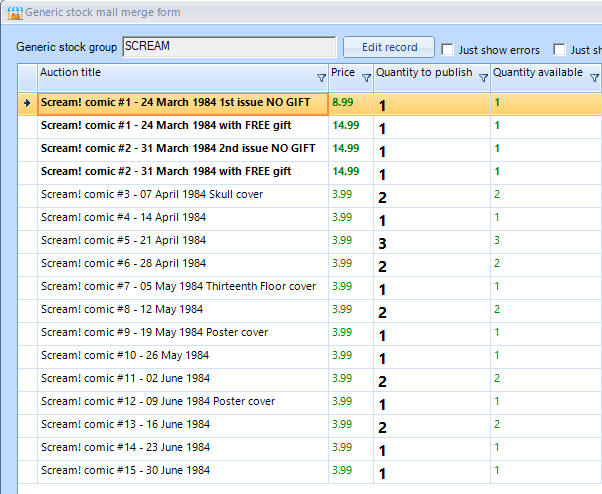
This allows you to check the format and also spot errors. If you look carefully, then second issue with no free gift is 14.99 which is the same price as with free gift, so you can then go back to the product record and amend pricing mistakes if you spot any.
Let's have a look at the first entry. We have merged the 'Title template' of:
Scream! comic #<ISSUENO> - <ISSUEDATE> <TITLEADDITIONAL> <EXTRAIFROOM>
to:
Scream! comic #1 - 24 March 1984 1st issue NO GIFT
which is from it's product record:

12. You can fine-tune the display of fields. For example, you may want to insert a prefix for <TITLEADDITIONAL> which is the placeholder variable name for the above 'eBay title add' field. So if you click on the 'System merge options' button, you can add " - " as a prefix if this field is used:

and save, which has the affect on the preview:
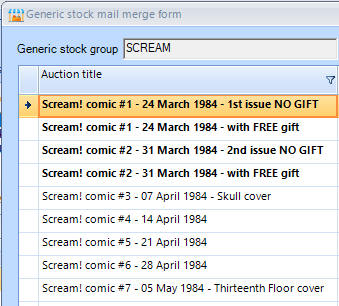
13. eBay gives us 80 characters for titles. Now the above titles are quite short so we have some room for some additional keywords that may help eBay buyers fiend our listings. Fill in these boxes:
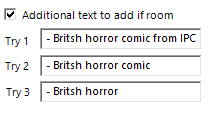
Using this text:
- British horror comic from IPC
- British horror comic
- British horror
making sure there is a space " " at the start.
14. Use the 'Preview mail merge auctions' button again and see the results:
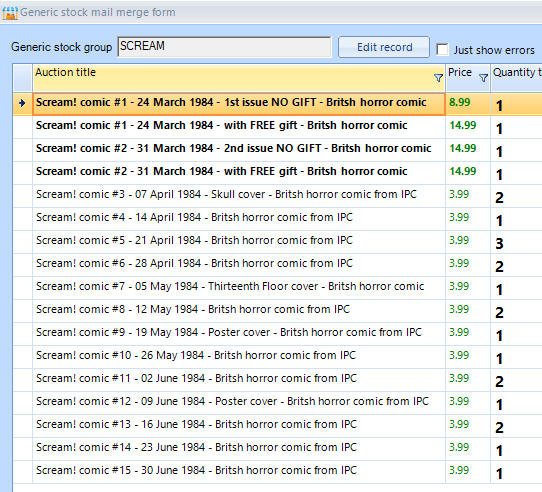
You'll notice that on the first line, " - British horror comic" has been added to keep within the 80 characters title limit, but on other entries like:
Scream! comic #12 - 09 June 1984 - Poster cover - British horror comic from IPC
there was room to add " - British horror comic from IPC" (IPC was the publisher's name).
Close the preview if still option. We have finished this section now.
15. Now in the next panel, changed the 'Background template' to 'Comics good' which is the picture template we set up ealier.

The other options on this panel are for individual auctions, so nothing else to do on this panel. The 'Preview final merged pictures' button doesn't do anything with a template but if you wanted to check your background template, you could use the 'Edit' button.
We are also skip over the pictures panel. This is where you would choose picture for individual auctions but because this is a mailmerge, then the pictures will automatically be collected from the stock system for each product, so nothing to do here.
16. Click on the 'Description builder' button to open up the Description builder screen and then click on the 'Insert field' button and select the 'Item <CONDITION_DESCRIPTION> field and click on 'Select':
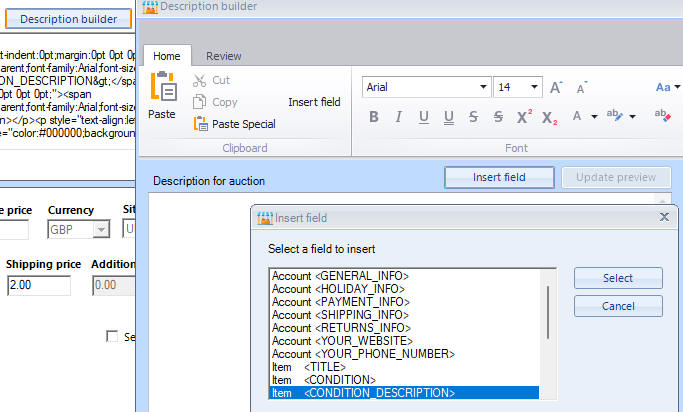
Then press the return/enter key on your keyboard twice and then enter some more text:
Packaging
We send all comics in a board backed envelope your order will arrive in excellent condition.
So our finished description looks like:
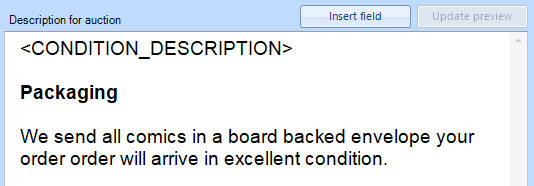
This demonstrates that you can use place holder variables like <CONDITION_DESCRIPTION> in your description.
We have put the 'Packaging' in bold text. Click then 'OK' button to return to the previous screen and you can now see a preview of your final description:

17. Prices panel:

(We using an eBay UK account for this walkthrough so you will see different shipping services if using ebay US, eBay Australia, etc)
- In the main merge options at the top of the screen, we opted to 'Use the price' field:

so we don't need to set a price here, as each auction created with our mailmerge will have the stock system price for the 'Good' grade. We do need to put in a 'Shipping service', 'Shipping Price' and 'Additional item'. The red warning label is asking us to put in the additional shipping price, otherwise if a buyer orders 3 of the same product, you are only getting one delivery charge. This might be fine as you see this as a discount, or if you were selling heavy items, this would make a big difference.
Put 1 in the 'Addition item' box, so if a buy buys two of the same product, they would page 2.00 + 1.00 addition making a total delivery charge of 3.00.
We are not going to set any international delivery options for this one.
18. Format - Choose 'Fixed price' so that there become 'Buy-it-now' auctions.
19. Last job is to set item specifics. When we selected the category, eBay give us a list of addition boxes for that category that it would like you to fill in to help users find your items. For example, if you were selling T-Shirts, then item specifics would include Size, i.e. Small, Medium, Large, etc. When we selected eBay 259107 above for comics, then the item specifics for comics are displayed:

Sometimes the item specifics for the same category number are different on eBay US and eBay UK.
The first item specify is 'Publication Frequency' and with this one eBay has provided us with a list of common entries, so scroll down the list and click on 'Weekly', then click on the 'Next field' button to lock that in.
In the 'Tradition' box, there is no option for 'UK Comics' so just type this in and click on 'Next field'.
Click on the 'Publication Year' entry on the list and put in '<YEAR>' and 'Next field'. <YEAR> is a placeholder field which will automatically be replaced with the year. There are loads of variables that can be used: Stock System Mail Merge fields for more information.
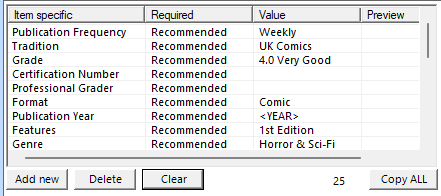
You can just copy the list below and then use the 'Load from mem' (memory) button to load the list instead.
Publication Frequency=Weekly
Tradition=UK Comics
Grade=4.0 Very Good
Format=Comic
Publication Year=<YEAR>
Features=1st Edition
Genre=Horror & Sci-Fi
Publisher=IPC
Type=Comic Strip
Vintage=Yes
Language=English
Universe=Scream!
Country/Region of Manufacture=United Kingdom
The finish list should look like:
20. All finished. Now click on the 'OK' button to save your new auction. As long as all the compulsory boxes for eBay have been filled in, then is should save OK.
Next step - Step 10
Previous step - Step 8
Return to Step 1
Support
Any problems with the walkthrough? Just contact our Support Department and they will be happy to help.