STEP 6 - Creating a background picture template file for the rear product pictures
We are going to repeat Step 5 above but this time create a 'RearPictureTemplate' file, so if you get stuck, look back at the pictures in Step 5.
1. On the main menu, click on 'Background images' and then 'Create Background Picture' and then select the 'General 04':
2. Click on the Create button which loads the designer.
3. We just need to quickly adjust how pictures display. Double click the centre picture, and go to the 'Auto crop' tab. Change the entry to 'AUTOCROP KEEP PICTURE SHAPE'.
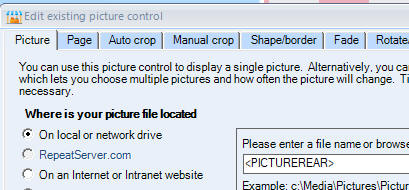
4. Now click on the 'Picture' tab and replace <CURRENTPICTURE> with:
<PICTUREREAR>

and click on 'OK' to close the edit screen.
5. Click on <CURRENTPICTUREDESC> to select it and then right mouse click and delete it
6. Double click <CURRENTPICTURETITLE> and then change the text to:
<PICTUREREARDESC>
Make sure this is exactly the same as above and click on OK.
7. For the second, let's just save the template as is, so click on 'File' then 'Save' and enter 'RearPictureTemplate' as the name:
8. Close the designer by clicking 'File' on the menu and then 'Exit'.
Next step - Step 7
Prevous step - Step 5
Return to Step 1
Support
Any problems with the walkthrough? Just contact our Support Department and they will be happy to help.