NOTE - Background image templates are a feature of the Jumble Saler STANDARD edition and higher. You can test them in the Jumble Saler FREE edition, but you will not be able to publish your auctions with them. You can preview how they would look by setting one up and previewing on of your new auctions.
Walk through to create a background template rule that uses different templates for different pictures
and also passes different text to each picture
This is done in 3 steps:
1. Create a template file for the main picture.
2. Create a template file for pictures other than the first 1, i.e picture 2, 3, 4, etc
3. Create an advert template file that will be added as the last picture automatically (unless the auction has 12 pictures).
4. Adding template files to the system
5. Use it on a new auction.
1. Creating the template file for the main picture
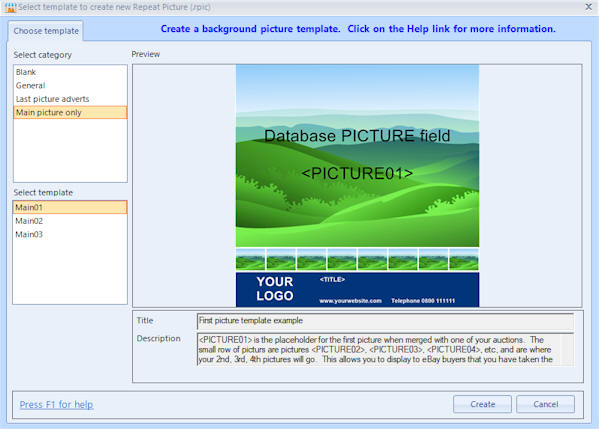
On the main Jumble Saler menu, click on 'Background images' and then 'Create background image'. Then select 'Main picture only' templates and chosoe the 'Main03' template:
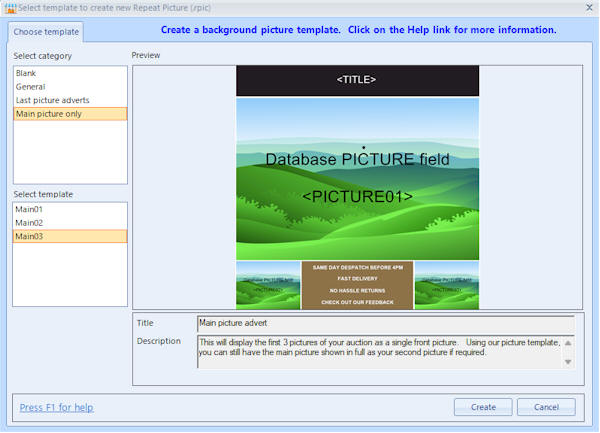
and you can click on 'Create' to open the designer:
The 3 picture areas are where your first 3 auction picture will sit when merged with the template. To customise:
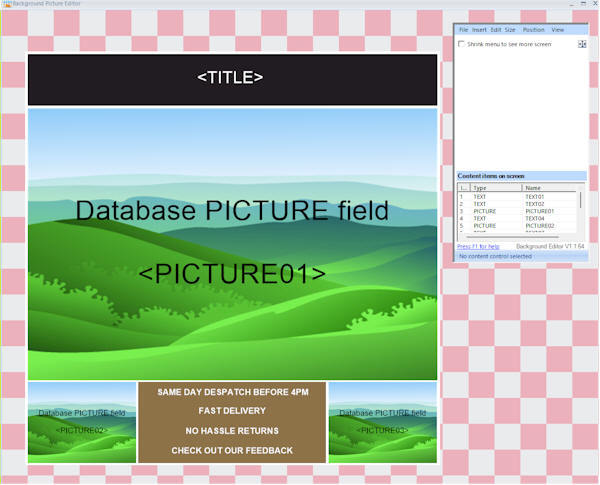
If you double click each of the text labels, such as 'FAST DELIVERY', you can alter the text, font size, etc.
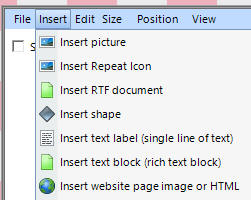
There are loads of options on the Insert menu, such as adding pictures or even icons:
When you have finished having a quick look at the designer, use 'File' and 'Save' to save your template to a separate template file (.rpic). Just call this one 'MainPicture'.
Next you need to add your background template to the system menu so that it can be selected by an auction or auctions.
NOTE - You can see variables (place holders) in the template. <TITLE> will be replaced with the auction's title. <PICTURE01> is where the first picture will go, and <PICTURE02> and <PICTURE03> are where the next two pictures go.
NOTE - Just in case you are wondering what happens if you use with an auction that only has 1 or 2 pictures, you can specify that the little pictures are invisible if no pictures available. To do this then double click them in the designer, go to the 'Back up' tab and put a tick in the 'Make this control invisible if no content' check box and click OK to save. What you can do is to insert another picture control the same size as <PICTURE03> and select an image or logo to display, and then position over the <PICTURE03> control and then right mouse click and use 'Send to back' to put it behind <PICTURE03>. Then this will be displayed when there is no picture number 3. You could do the same with a Text label control instead.
2. Create a template file for pictures other than the first 1, i.e picture 2, 3, 4, etc
Repeat step one, but choose General04 instead from the General category:
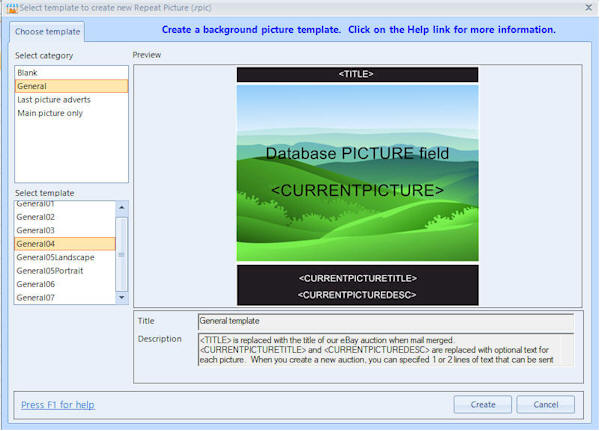
When the designer screen loads, When finished, use 'File' and 'Save' to save your template to a separate template file (.rpic). Just call this one 'AdditionalPictures'.
NOTE - You can see variables (place holders) in the template. <TITLE> will be replaced with the auction's title. <CURRENTPICTURE> is where a picture will go. With this template there is also <CURRENTPICTURETITLE> and <CURRENTPICTUREDESC>. When you create your auctions, you would need to specific text for each picture to pass into this template. With Jumble Saler, you can set up as many background picture rules as you like, so you could just do that for expensive auctions where you are pointing out specific features in each picture.
3. Create an advert template file that will be added as the last picture automatically (unless the auction has 12 pictures).
Repeat step one, but choose LastPictureAdvert01 instead from the 'Last picture adverts' category:
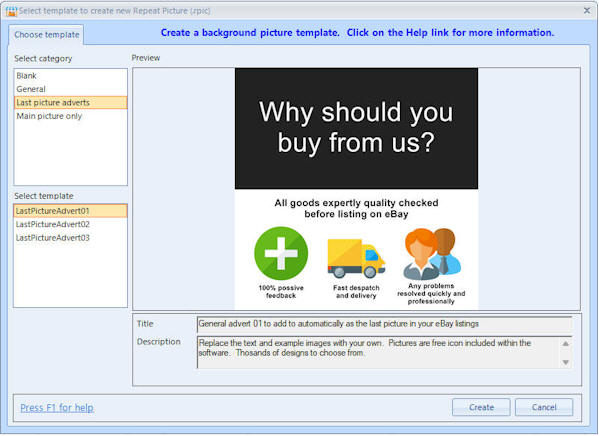
When the designer screen loads, When finished, use 'File' and 'Save' to save your template to a separate template file (.rpic). Just call this one 'LastPictureAdvert'.
NOTE - There are no variables (<TITLE>, <CURRENTPICTURE>, etc) in this template. This is an example which you could customise and even insert your own pictures, or even have professional graphic designed. This will be added as the last picture to ALL your auctions that use this background rule, but will only be added where you have less that the 12 pictures eBay allows. So if you auction has 1 to 11 pictures, it gets added, and if 12 then it's not added as you don't have room.
4. Adding template files to the system
Click on 'Background images' then 'Background image settings maintenance'. Use the 'Add' button to add your template file to your system.
Then:
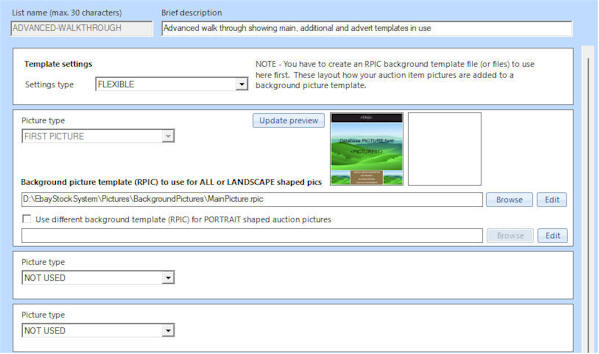
1. Select 'FLEXIBLE' from the Settings types box and put in 'ADVANCED-WALKTHROUGH' as the list name for the template rule.
2. Stick in a listname and description.
3. On the 'FIRST PICTURE' area, use Browse and select the 'MainPicture.rpic' file we created in Step 1 at the top of this page.
It should look like this at this point:
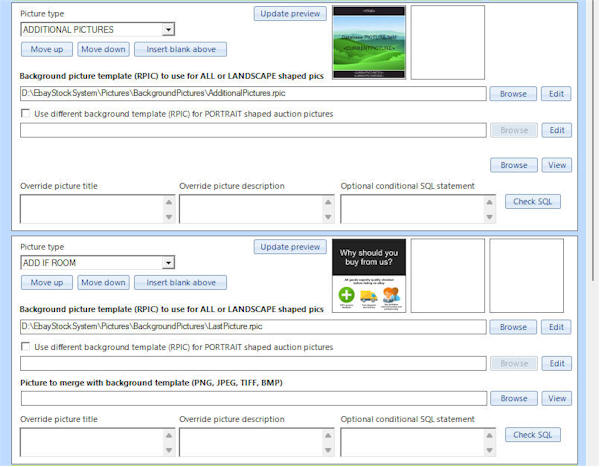
4. Go down to the next panel which says 'Picture type' "NOT USED". Change this to 'ADDITIONAL PICTURES' and then browse for the 'AdditionalPictures.rpic' file created in Step 2 towards the top of this page.
5. Go down to the next panel which says 'Picture type' "NOT USED". Change this to 'ADD IF ROOM' and then browse for the 'LastPicture.rpic' file created in Step 3 towards the top of this page.
The new ones should now look like:
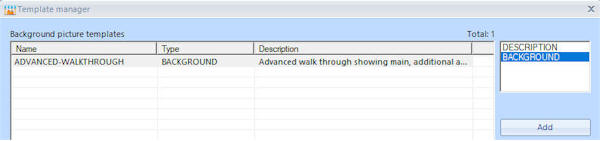
6. Save your template and call it '' with the 'OK' button and it will appear on the template manager list:
We are now ready to use this on a new auction, so you can see how the 3 individual image template files (.RPIC) change the way your auction pictures look.
5. Specifying a background template for a new auction
On the main Jumble Saler screen, click on the 'New auction lots' tab.
1. You will need to create a new auction with some pictures. You can just create a fake one for the second and use any old random pictures on your computer, or if you have already create one (published or unpublished) then find one to test on. The one below is one we just set up:
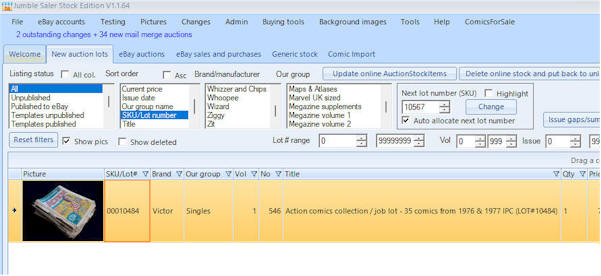
2. Double click you new auction to view it and then use the scroll bar so you can scoll down and see both the Background template panel and also the pictures panel:
In the above image, you can see there are 7 pictures, and then background template is set to NONE.
3. Now changed teh background template to our template created in Step 4 above, which should have been named ADVANCED-WALKTHROUGH.
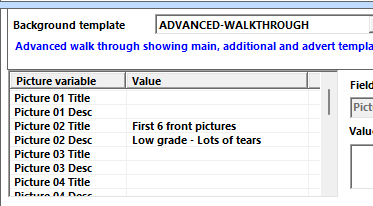
4. Our template is set to use the <CURRENTPICTURETITLE> and <CURRENTPICTUREDESC> variables, you in this case you need to put information next to each picture using the Picture variable grid. Skip 'Picture 01 Title' and 'Picture 01 Desc', as we aren't using these on the first picture, and just put some text in the Picture 02 entries:
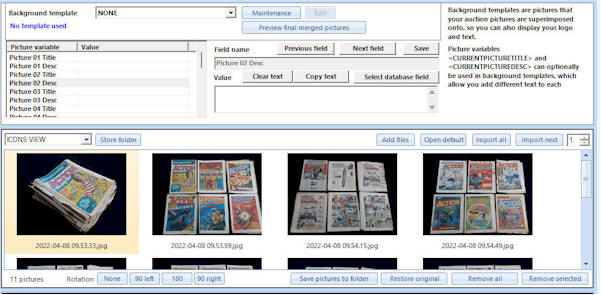
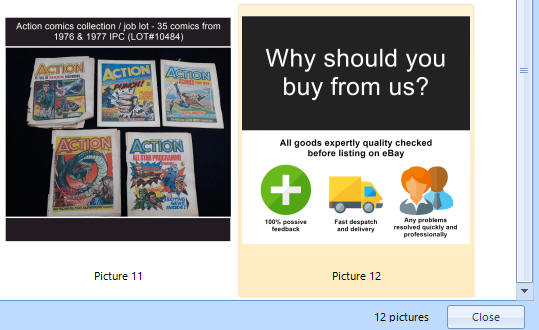
5. Click on the 'Preview final merged pictures' button to see the merged pictures at this stage:
Note - It may take 10 seconds to generate the preview pictures. This is because the system is very flexible and each picture needs merging with it's template separately. Scoll to the top to see the first pictures.
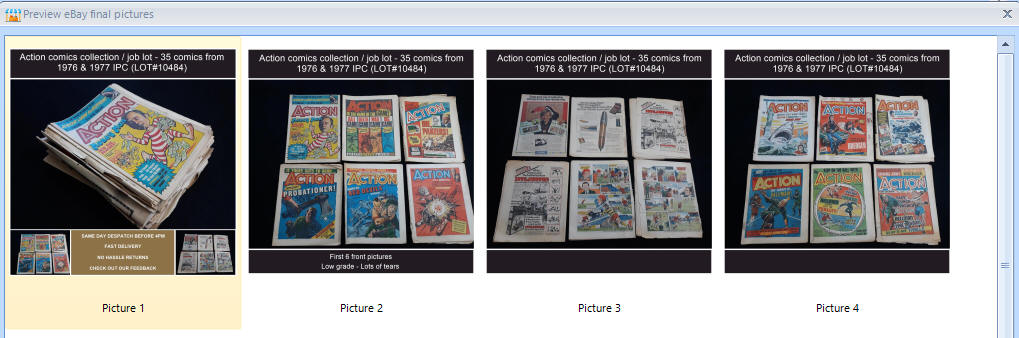
6. Have a look at Picture 1. This is are main picture and we used the template file we created called Main.rpic for this.
7. The additional pictures starting at Picture 2 are using the 'AdditionalPictures.rpic' template file. You will also notice that the text we put for Picture 2 is also dispalyed at the bottom. However, when you look at Picture 3, Picture 4, etc, because we haven't sent any text, then this area is blank. You could just amend your template to use the <CURRENTPICTURETITLE> and forget the description line completely.
8. Scroll down to the last picture. The last picture is just inserted as is and it's merged with any of your auction picture, which is the one we set in template file 'LastPicture.rpic'. All our templates are fully customisable with the designer that's built into Jumble Saler.
Walkthrough summary
This shows some of the flexibily of our system. Each of the picture template files can be fully customised using the designer. You can even insert your business logo (if you have one), and add information such as phone numbers or website addresses.
There are several other options when setting up your template rule, so you can have several of the auction pictures on your 1st picture if needed, but then also repeat Picture 1 as the second slide using the 'FIRST PICTURE AGAIN' option:
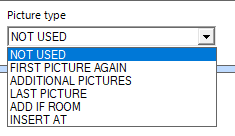
'INSERT AT' could also be used to put your advert pictures, like in the last picture example above, as any picture number, so if you wanted it as the second picture, then you can use 'INSERT AT' picture 2 instead.
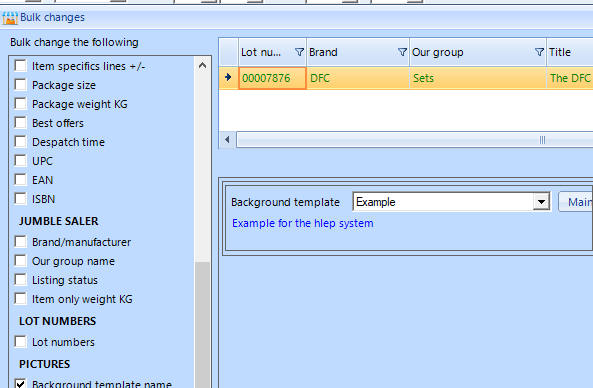
The designer can be a bit fiddly when positioning items but once you have a template rule set can also use our 'Bulk changes' button to change multiple auctions to use a template in one go:
Templates with multiple pictures
The template below is 'Main01':
<PICTURE01> is the placeholder for the first picture when merged with one of your auctions. The small row of picturs are pictures <PICTURE02>, <PICTURE03>, <PICTURE04>, etc, and are where your 2nd, 3rd, 4th pictures will go. This allows you to display to eBay buyers that you have taken the time to include lots of pictures which will encough them to click on your listing and take a look.
Here is how the finish first auction picture looks when merged with one of our auction which has 12 pictures:
However, if we then remove some of the pictures from the auction, leaving 5 pictures in total, it looks like:
This is because we have set a 'Backup' option to make the control invisible if not enough pictures. You can access this by double clicking a picture in the designer and using the 'Backup' tab on the properties screen that is displayed.
If you do use a main template with additional pictures, you can put either text or a picture or even one of the built in icons underneath. In the designer you can insert new controls:
and then once created, you can right mouse click them and use 'Send to back' to put them behind a on of the merged pictures, such as one using <PICTURE02>. This allows to you display something different, rather than leaving a blank space.
Setting a default background template for all your new auction lots
On the main Jumble Saler screen, click on 'File' then 'Program settings' and see the 'Backgrounds' tab. You can choose a default .rpic file or any of the templates you have put on the manager screen.

Passing different text to your template for each picture
In you background template RPIC file, you can use the variables like <TITLE>, which gets replaced with the auction title. However, you can also use <CURRENTPICTURETITLE> (current picture title) and <CURRENTPICTUREDESC> (current picture description) and specify text to display for every one of the auction pictures.
In the picture below, we are planning to just use the <CURRENTPICTURETITLE> (current picture title) variable and have put different text for 'Picture 01 Title', 'Picture 02 Title', etc. You can even put in other variables like <TITLE> as well.

This means you can use one background template RPIC file and change the text that goes with each picture if required. Also useful for pointing out a fault or a feature on a particular picture.
Support
Feel free to contact Jumble Saler Support with any 'How do I ....' questions you have on setting up and using templates.